A Blog CI/CD Pipeline with AWS and GitHub — Part 2: Buildspec
Write a CodeBuild buildspec with installation and build phases, artifact selection, naming, and directory preservation.
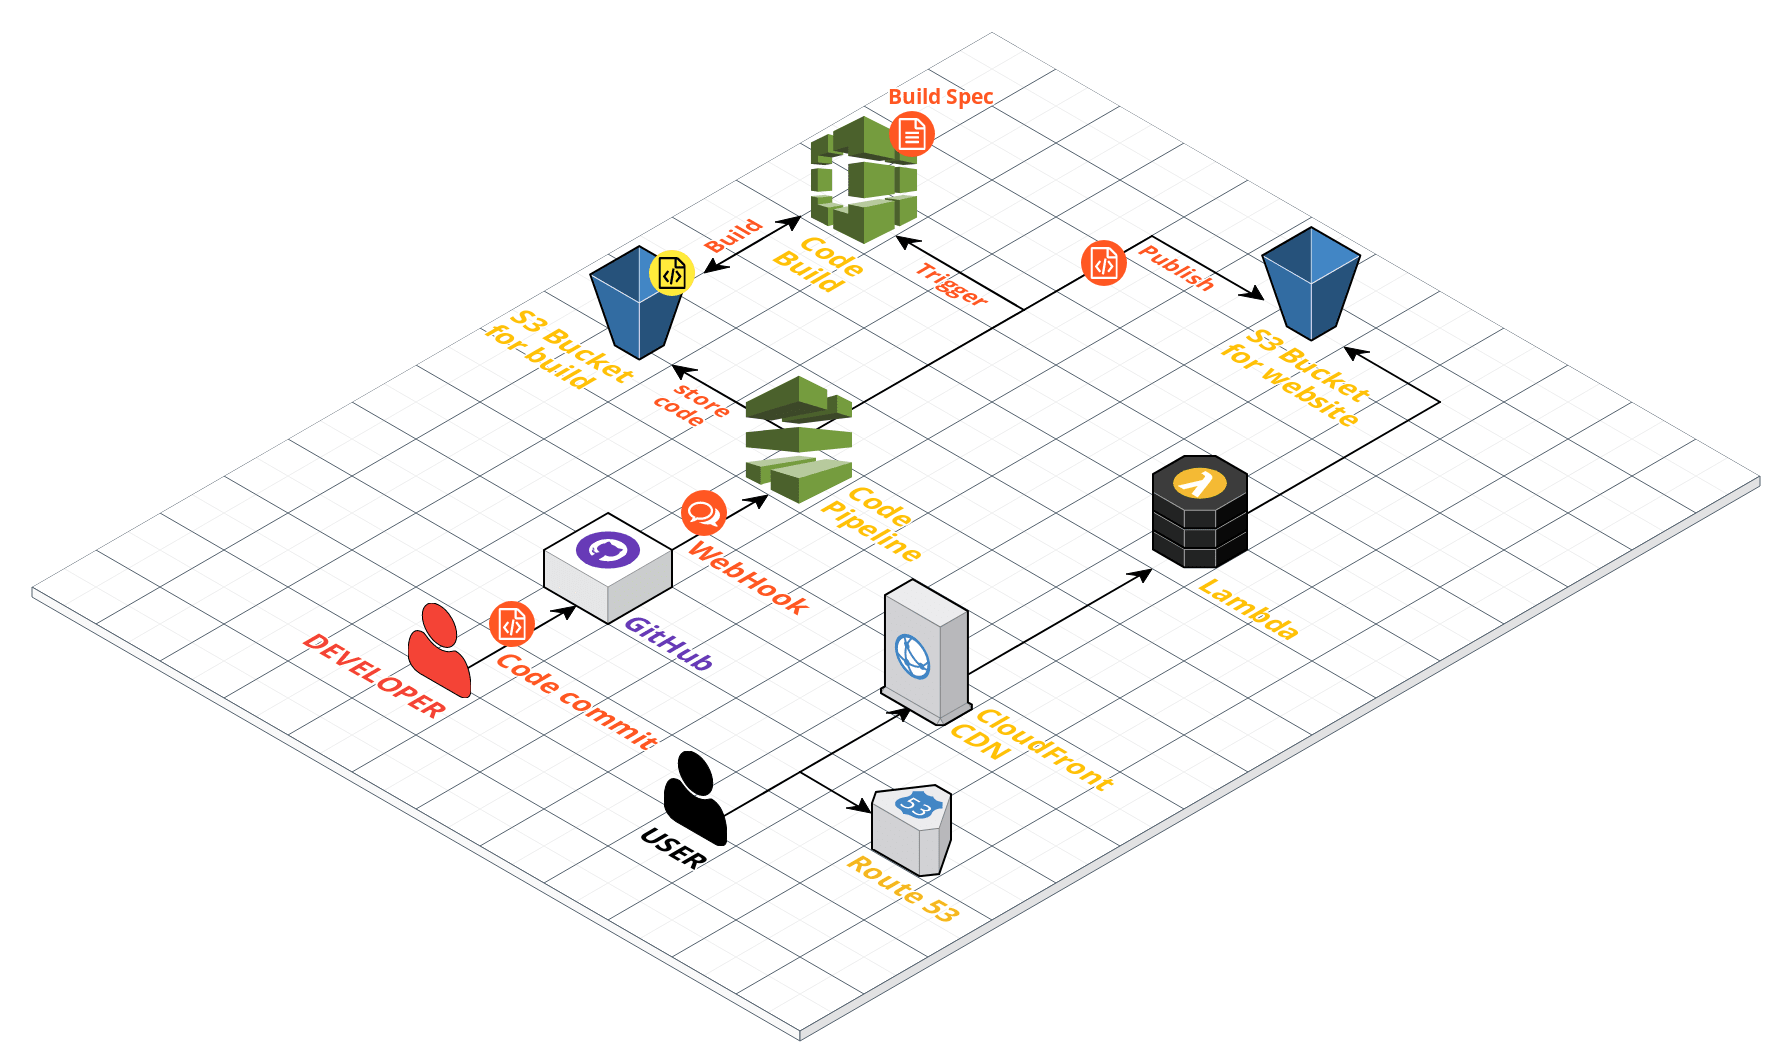
With CodePipeline configured, the source retrieved from GitHub appears in the artifact bucket as a ZIP archive. The next step is to tell CodeBuild how to turn that source into the website. Those instructions belong in buildspec.yml.
Understand the buildspec structure
A buildspec describes the commands used to build and test a project, much like a Jenkins Pipeline script. CodeBuild normally looks for buildspec.yml in the source root:
# Location of buildspec.yml in the project root
.
├── _config.yml
├── buildspec.yml
├── db.json
├── node_modules
├── package.json
├── scaffolds
├── source
└── themes
Its main sections include:
- Environment (
env): environment variables and references to configuration or credentials kept outside the repository. - Build phases (
phases): installation, preparation, building, and post-build commands. - Reports (
reports): how test-report files are collected. - Artifacts (
artifacts): which output files are handed to the next stage.
There are many more options. The buildspec reference is the place to check details when the simple examples no longer cover the requirement.
The build phases
The central pieces are the buildspec version and the commands that perform the build. Here is an intentionally incomplete illustration, with the YAML indentation corrected:
version: 0.2
phases:
  build:
    commands:
      - hexo generate
artifacts:
  secondary-artifacts:
    artifact1:
      files:
        - public/*
      name: secondary-artifact-name-1
This defines one build phase and an output artifact. It introduces the shape of the file, but is not a complete installation and deployment recipe.
What belongs in each phase?
The larger example below retains the original Node.js 10 environment to document the historical setup. It is not a recommendation to use that retired runtime for a new project. The optional theme URL is an upstream example, rather than a link to a personal fork.
version: 0.2

env:
  variables:
    SUBMODULE_URL: "https://github.com/ppoffice/hexo-theme-icarus/archive/refs/heads/master.zip"

phases:
  install:
    commands:
      - echo Entered the install phase...
    runtime-versions:
      nodejs: 10
  pre_build:
    commands:
      - npm install hexo-cli -g
      - npm install hexo --save
  build:
    commands:
      - echo "Build started on `date`, triggered by $CODEBUILD_WEBHOOK_TRIGGER"
      - hexo generate
  post_build:
    commands:
      - echo "Build completed on `date`"

artifacts:
  secondary-artifacts:
    artifact1:
      files:
        - '**/*'
      base-directory: public
      discard-paths: no
The four phases divide responsibility as follows:
install: prepare tools or runtimes needed by the build environment.pre_build: prepare the application and its dependencies, such as npm packages or Python dependencies.build: run the core build commands, such asmakeorhexo generate.post_build: perform follow-up work, such as packaging binaries or publishing a container image.
A project using Git submodules needs special attention. In this original pipeline configuration, the submodule contents did not arrive with the source artifact, so I downloaded the theme separately during preparation and placed it in the expected directory. Check how your chosen source integration handles submodules rather than assuming their files are present.
Because CodePipeline supplied the source artifact, CodeBuild ran these commands from the project root. There was no need to add a cd command before every step.
Hand the output to CodePipeline
The artifacts section selects the files passed to later stages. It can collect an entire directory, match selected file types, preserve paths, discard paths, or produce multiple artifacts.
CodeBuild packages the selected output for CodePipeline. The deployment stage then consumes that artifact and publishes the site to S3; there is no need to recreate the whole delivery process inside the build script.
An artifact can also have a name based on the build date:
version: 0.2
phases:
  build:
    commands:
      - make
artifacts:
  files:
    - '**/*'
  name: myproject-build-$(date +%Y-%m-%d)
For revision-specific naming, CodeBuild environment variables, including CODEBUILD_SOURCE_VERSION, can identify the source revision associated with the result.
Select files and preserve the intended paths
Suppose the source tree contains:
|-- my-build1
|     `-- my-file1.txt
`-- my-build2
      |-- my-file2.txt
      `-- my-subdirectory
            `-- my-file3.txt
To collect files from matching my-build* directories recursively and flatten the output:
artifacts:
  files:
    - '**/*'
  base-directory: 'my-build*'
  discard-paths: yes
Here, **/* means recursive file matching, base-directory selects the starting directory, and discard-paths: yes removes the directory hierarchy. The resulting artifact looks like:
|-- my-file1.txt
|-- my-file2.txt
`-- my-file3.txt
A static website usually needs the opposite: its directory structure must remain intact. Use the generated public directory as the root and preserve paths:
artifacts:
  files:
    - '**/*'
  discard-paths: no
  base-directory: public
With discard-paths: no, an article under public/posts/example/index.html remains under posts/example/index.html in the artifact. This matters for links, images, and directory-style URLs.
At this stage, the pipeline can build and package the website. Next, Part 3 covers CloudFront, Route 53, and Lambda@Edge.
Thanks for reading. Have a question or a different perspective?
Follow via RSS →