A Blog CI/CD Pipeline with AWS and GitHub — Part 1
Connect GitHub, CodePipeline, CodeBuild, and S3, and resolve the artifact-bucket permissions needed by the build.
In this article
After working with CI/CD, I came across AWS CodePipeline and had a simple idea: when I commit a new article to GitHub, why not let the site rebuild and publish itself? Hosting the generated files on S3 would also remove the need to maintain a VPS.
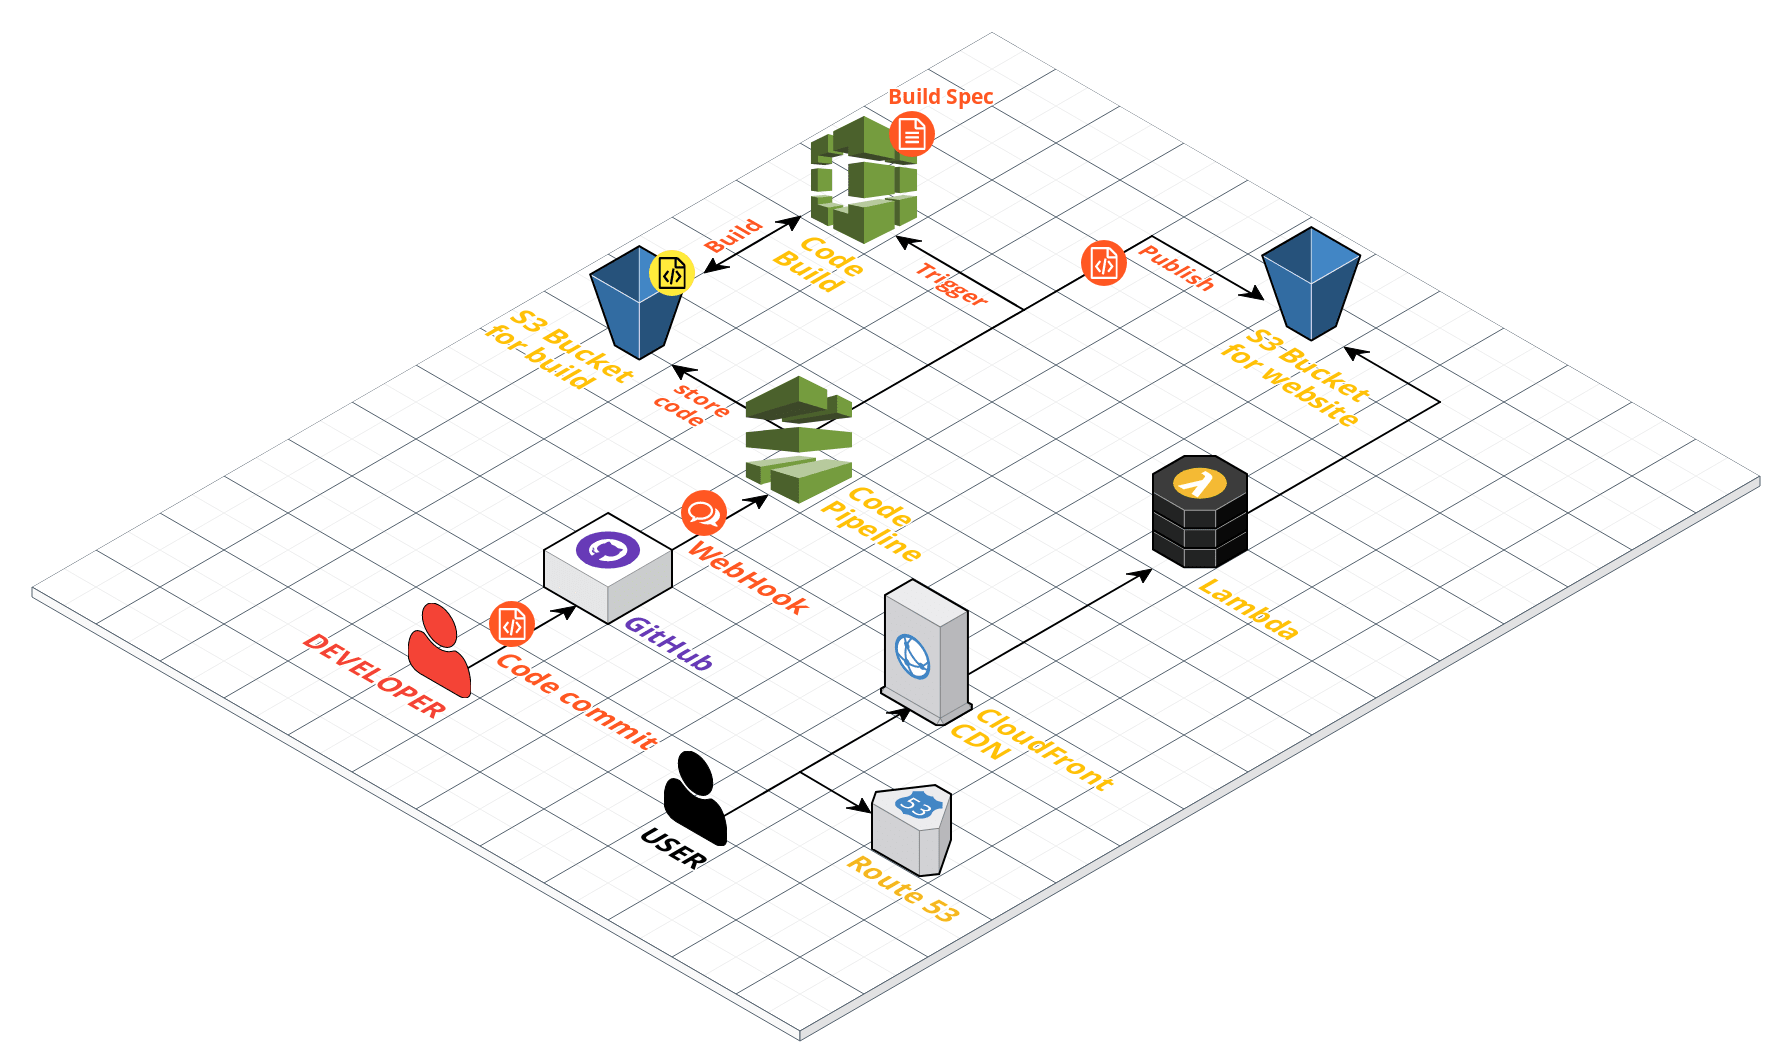
That small idea eventually grew into a pipeline involving CodePipeline, CodeBuild, S3, Route 53, CloudFront, Lambda, and IAM. This first part explains how the pipeline fits together, how to create it, and why its service roles need access to the artifact bucket.
How the architecture grew
The delivery path is:
GitHub commit → CodePipeline → CodeBuild → generated static files → S3
                                                                ↑
Browser → DNS in Route 53 → CloudFront → Lambda@Edge URI rewrite ──┘
CodePipeline coordinates the delivery stages. CodeBuild runs the build commands. S3 stores the generated site, while CloudFront distributes it. Route 53 handles the domain, and a small Lambda@Edge function makes directory-style URLs work with the chosen origin arrangement.
Each service acts through an IAM identity with its own permissions. When a stage fails, the relevant role may need a policy adjustment; granting permissions to one service does not automatically grant them to the others.
The series is split into pipeline configuration, the CodeBuild buildspec, CloudFront and Lambda, and a follow-up on Hexo theme changes and private configuration.
CodePipeline and CodeBuild have different jobs
CodeBuild is a managed build service. It can install dependencies, compile code, run tests, and package output using commands you supply. CodePipeline connects the larger delivery process.
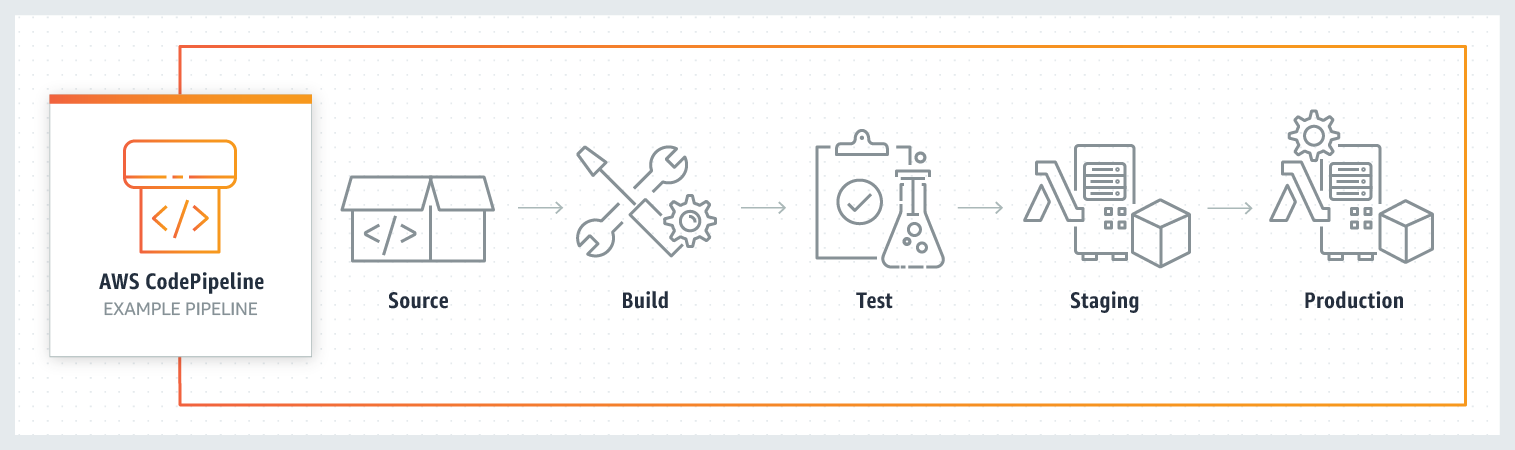
A pipeline can include these stages:
- Source: retrieve the application or site source.
- Build: call CodeBuild, or another build system such as Jenkins.
- Test: run checks, potentially in a separate build job.
- Deploy: deliver the output to its destination.
A validation-only pipeline does not need a deployment stage. For this blog, the actual path is Source → Build → Deploy: generate the static files, then publish them to S3. This corrects an old label in the original article that called the final stage “Test.”
Create the artifact and website buckets
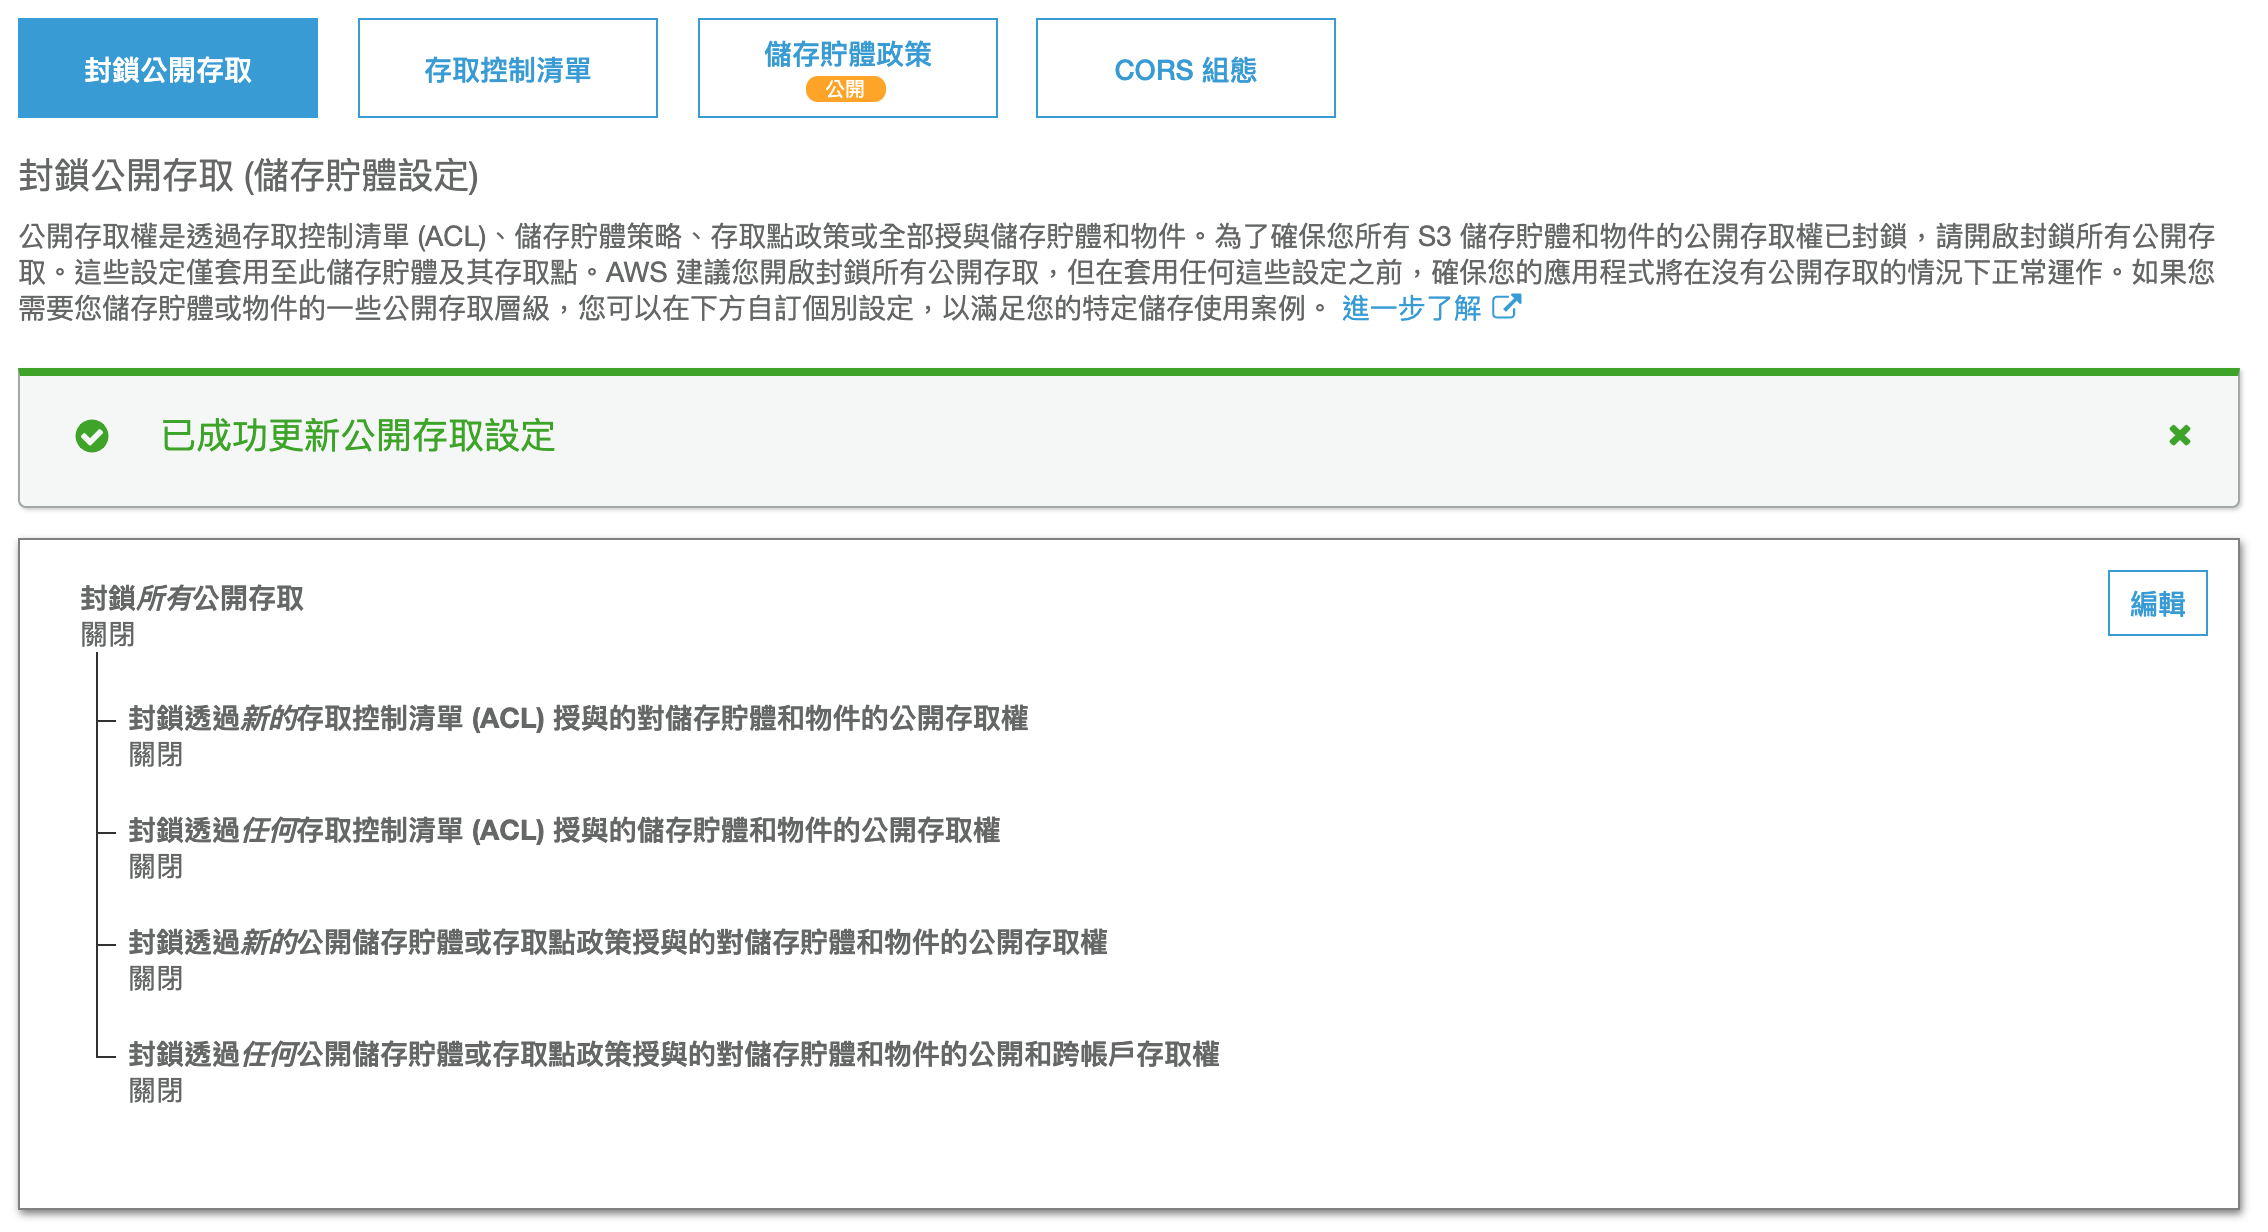
Prepare two S3 buckets. In the examples below, example-blog-build stores pipeline artifacts and example-blog-public stores the generated website. These are illustrative names; S3 bucket names must be unique.
The public website arrangement used in this historical setup allowed anonymous reads of site objects. Its bucket policy was:
{
  "Version": "2012-10-17",
  "Statement": [
    {
      "Sid": "PublicReadGetObject",
      "Effect": "Allow",
      "Principal": "*",
      "Action": "s3:GetObject",
      "Resource": "arn:aws:s3:::example-blog-public/*"
    }
  ]
}
This policy permits anyone to read objects in that bucket; it does not grant permission to upload or list objects. The bucket’s public-access settings must also permit the intended policy. Keep private artifacts and credentials out of this bucket. This describes the original public-origin design, rather than a requirement to make every S3-backed site public.
Create a CodePipeline
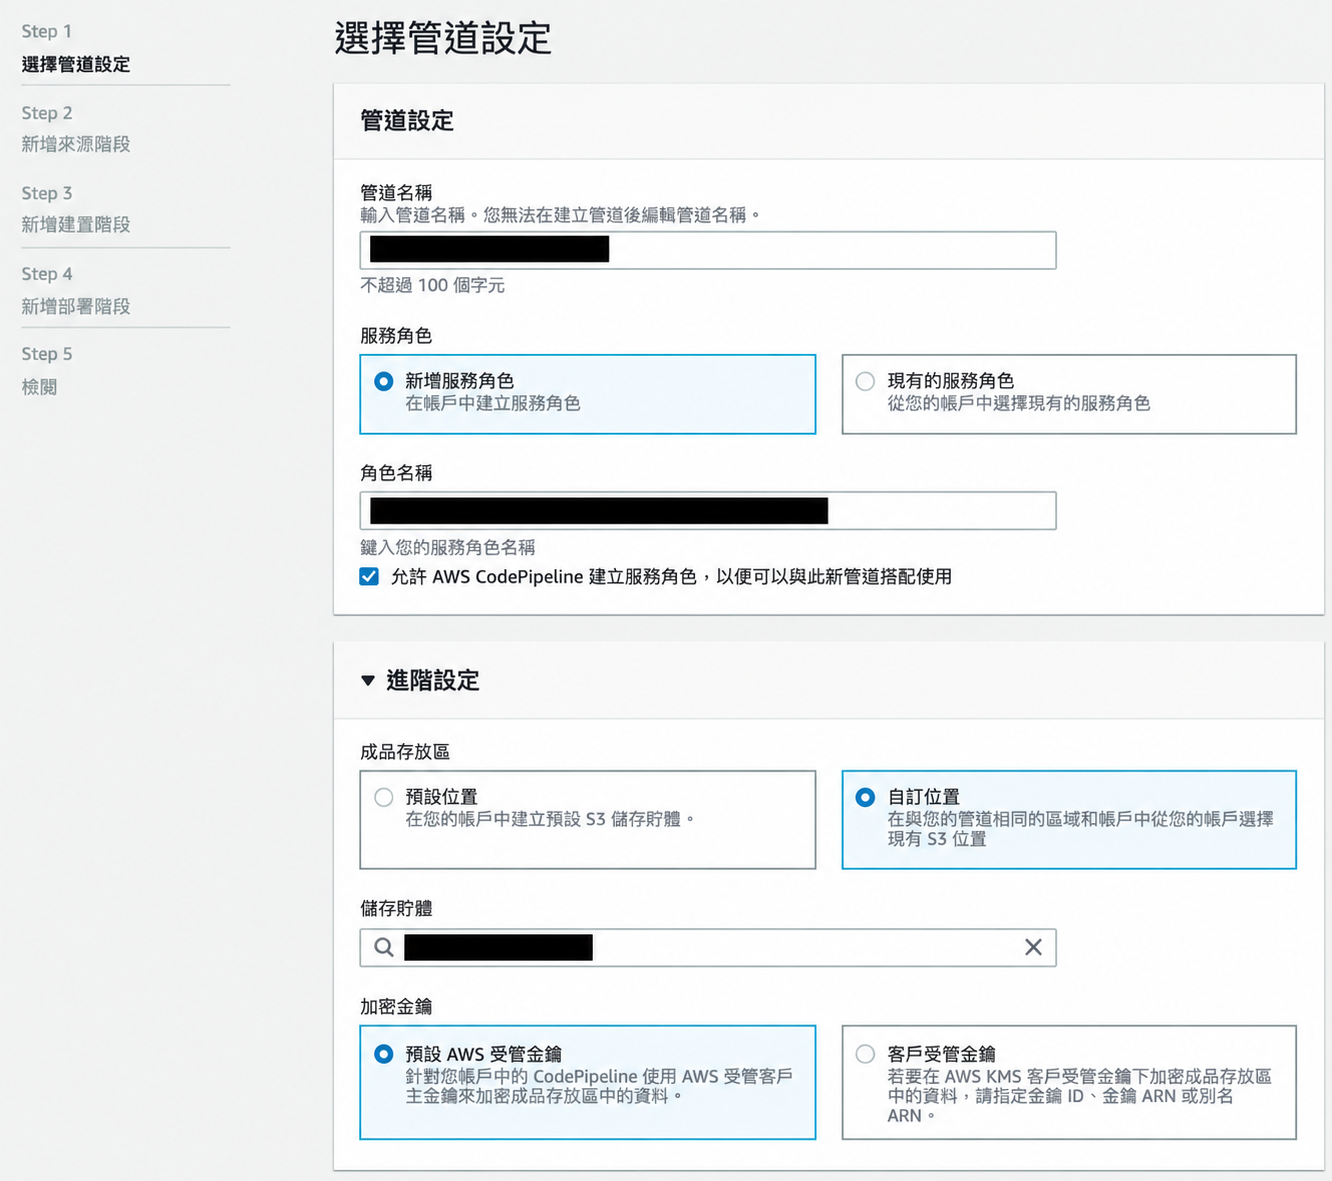
In the pipeline configuration, choose a name, an artifact location, and a service role. The role is the identity CodePipeline uses to interact with the services involved in the pipeline.
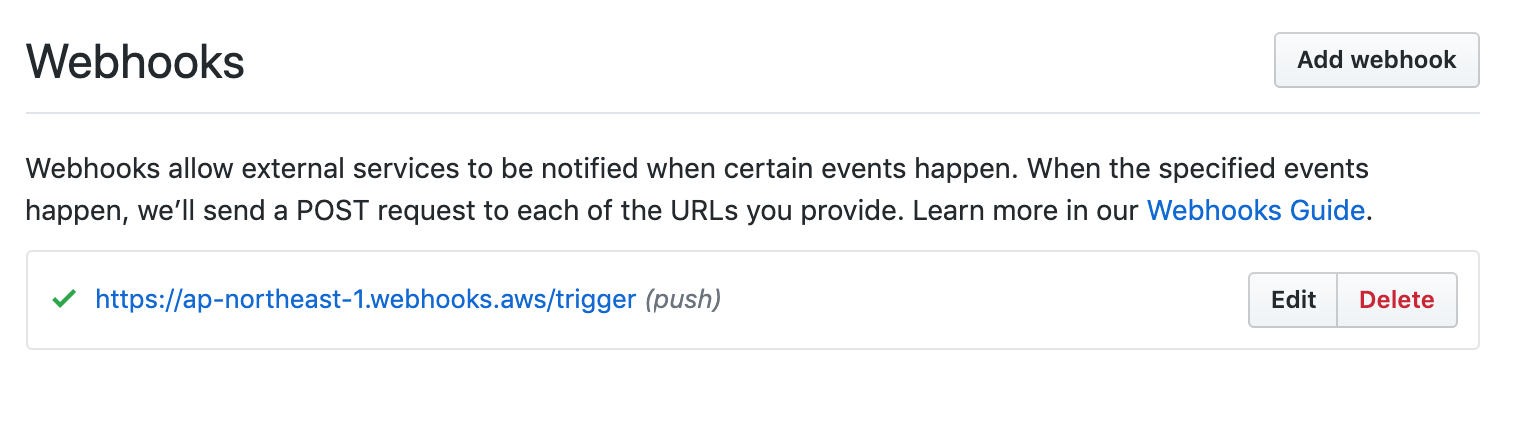
Next, add GitHub as the source and authorize access to the intended repository. In the integration used for this setup, a GitHub webhook notified AWS when new commits arrived. AWS configured the webhook, which could then be inspected in the repository settings.
The important behavior is that a source change creates a new delivery run without requiring a manual build.
Create a CodeBuild project
For the build stage, choose CodeBuild and create a project. Consult the CodeBuild build-image reference when selecting an image and language runtime. The runtime choice also appears in buildspec.yml.
CodeBuild exposes settings for build timeout, certificates, VPC networking, compute resources, and environment variables. The project configuration establishes the environment; the buildspec explains what commands should run inside it.
The buildspec is the more involved part, so the next article covers it separately.
Configure the deployment stage
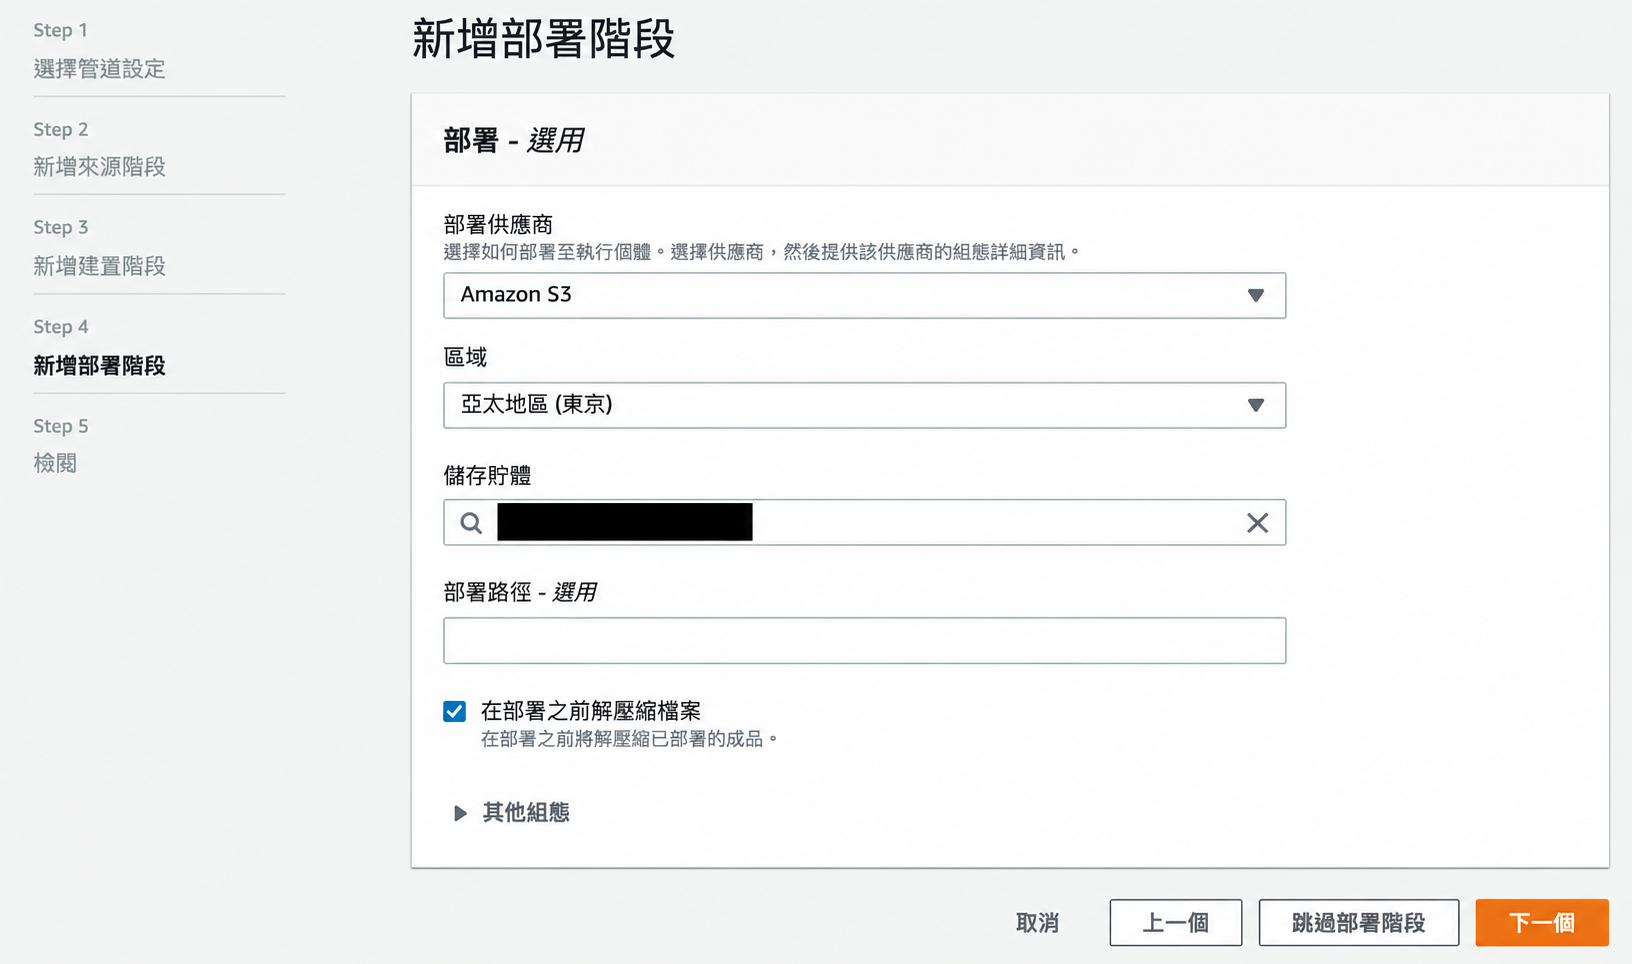
Choose Amazon S3 as the destination and select example-blog-public. The deployment can target the bucket root or a particular prefix.
At this point, the pipeline exists, but it does not yet know how to build the site. You may see source artifacts arrive in example-blog-build without a generated website appearing in the destination. The missing piece is the buildspec.
Give CodeBuild access to the artifact bucket
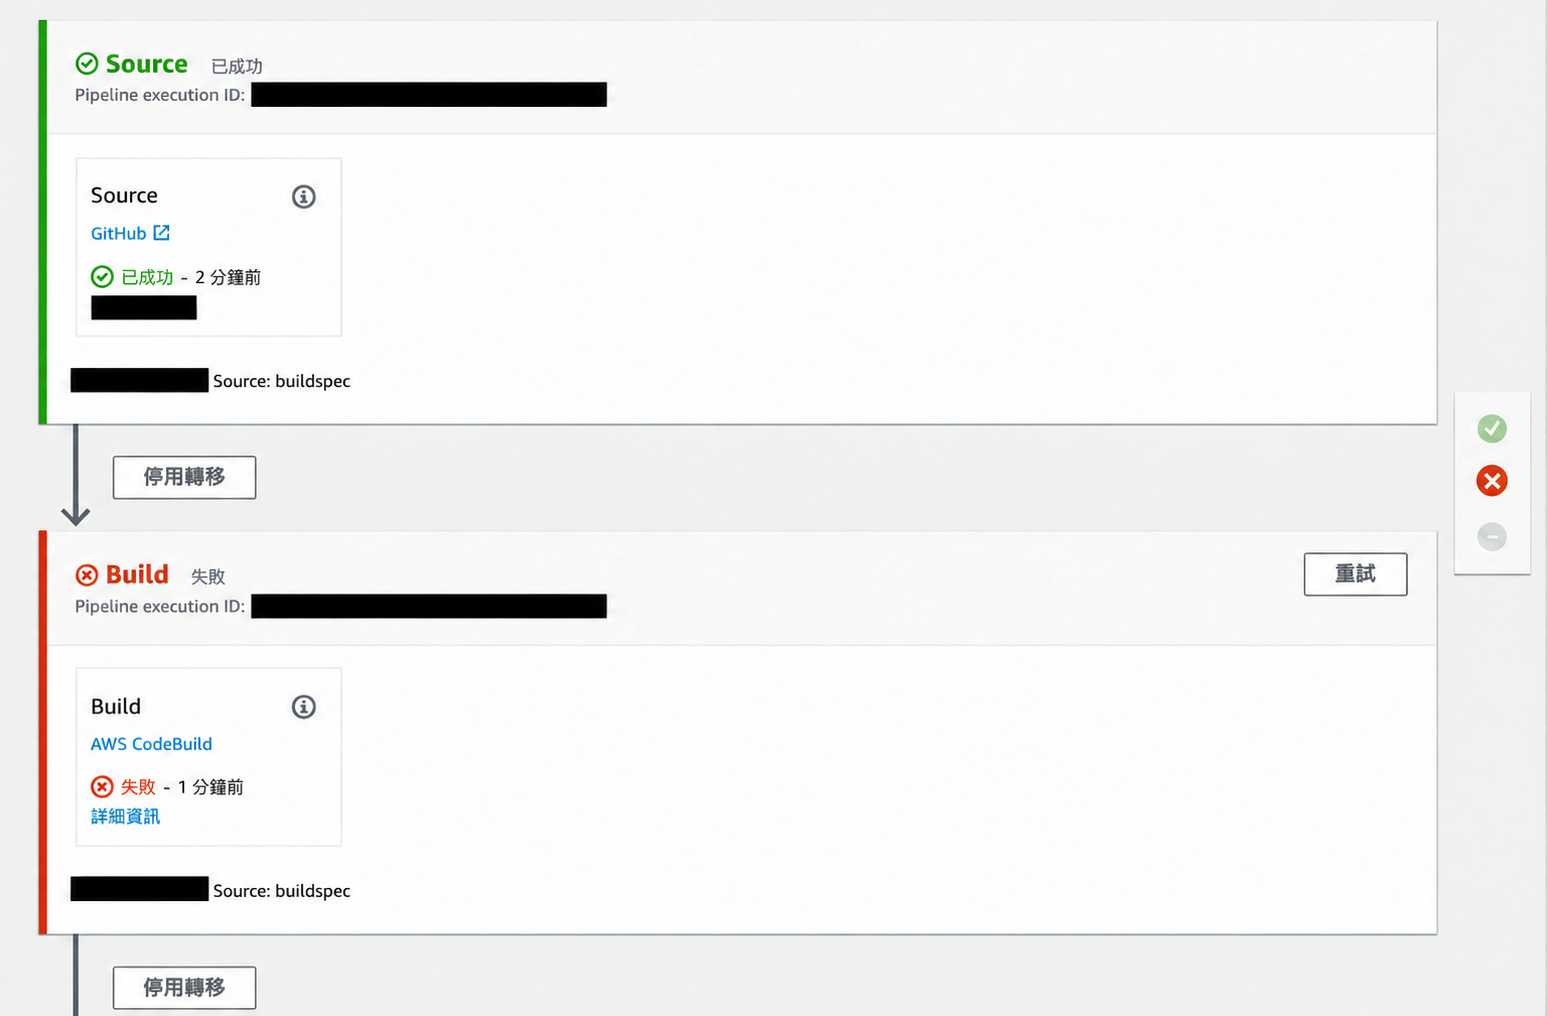
A first run can fail with:
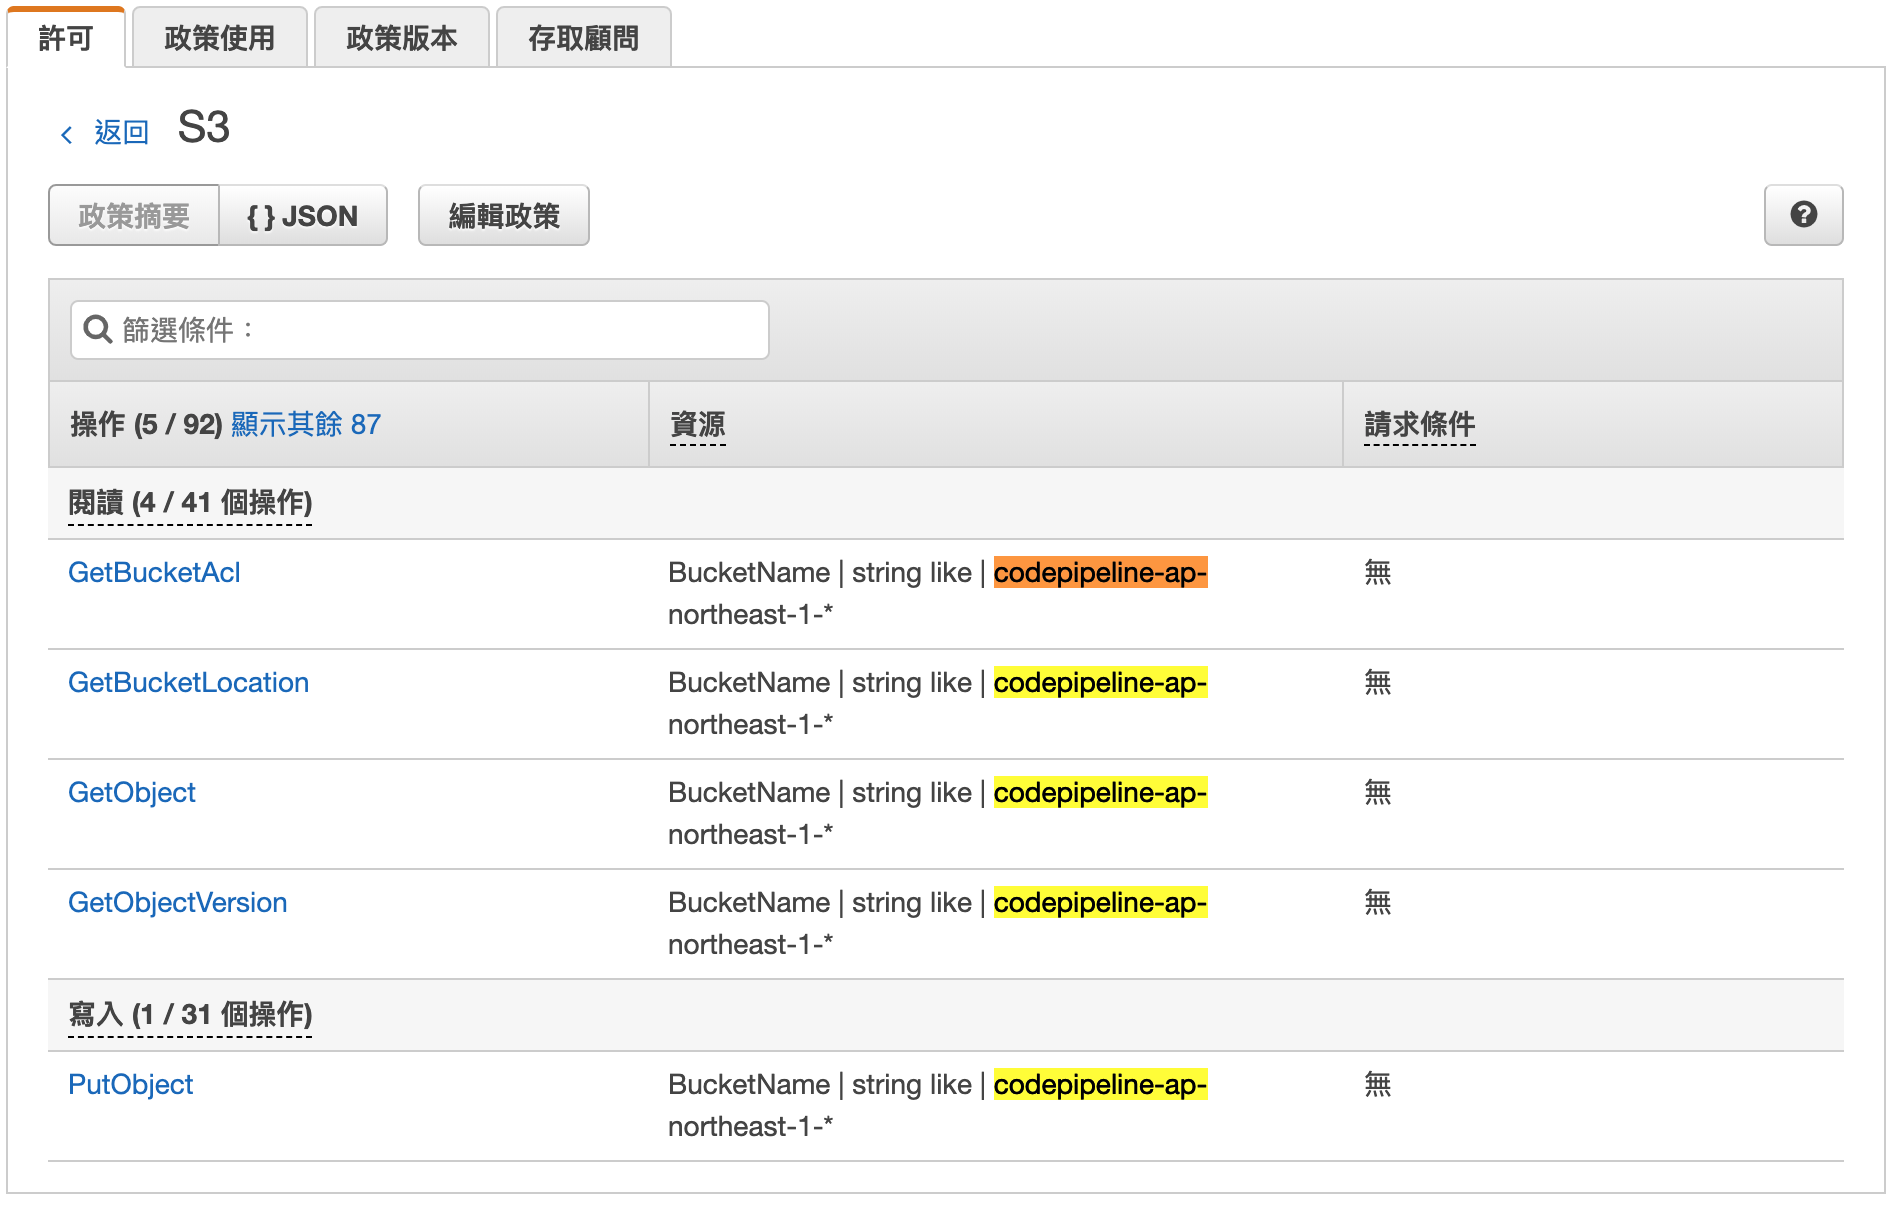
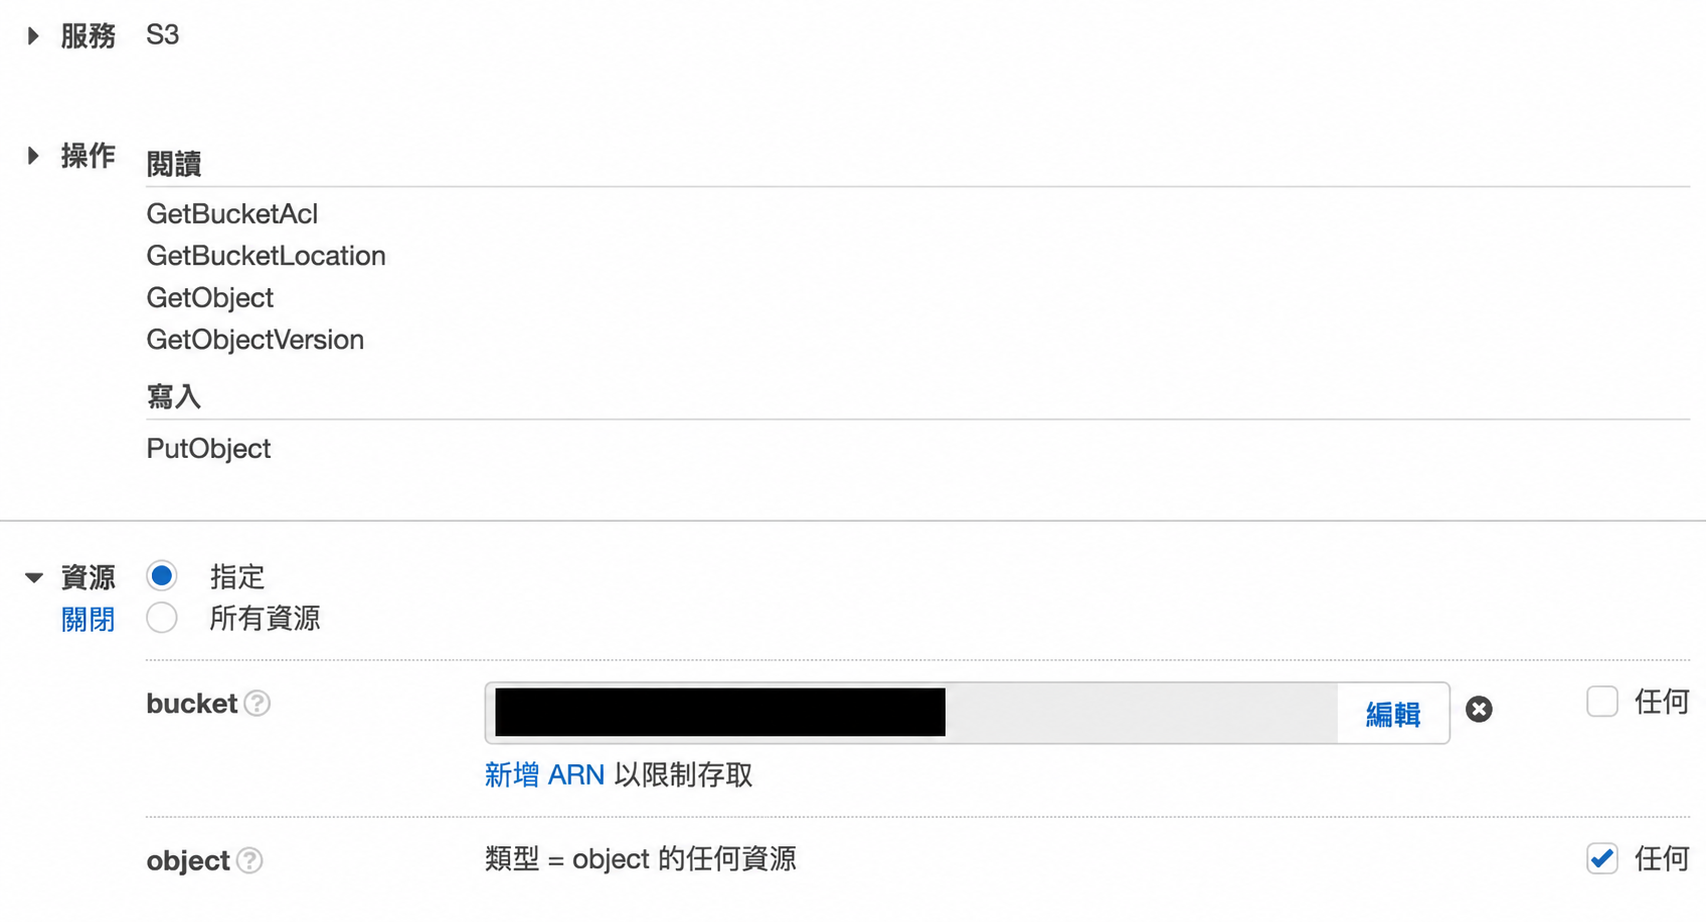
CLIENT_ERROR: AccessDenied: Access Denied status code: 403In this setup, the problem was the CodeBuild service role’s S3 policy. Inspect IAM → Roles → codebuild-CodeBuildBasePolicy-<BuildName>-<region>.
The generated policy in the original configuration covered artifact locations with a codepipeline prefix. The chosen custom bucket did not match that resource scope.
Adjust the policy so the required S3 operations apply to the actual artifact bucket and its objects. Bucket-level operations use a bucket ARN such as arn:aws:s3:::example-blog-build; object-level operations use arn:aws:s3:::example-blog-build/*. Scope the actions to the build’s needs rather than granting access to every bucket.
Once this permission issue is resolved, CodeBuild can retrieve the input artifact. It still needs instructions for installation, generation, and packaging.
Continue with Part 2: Writing the CodeBuild buildspec.
Thanks for reading. Have a question or a different perspective?
Follow via RSS →